Select the Field Samples tab or Field Sample Form to enter information relating to samples to be and that have been collected.
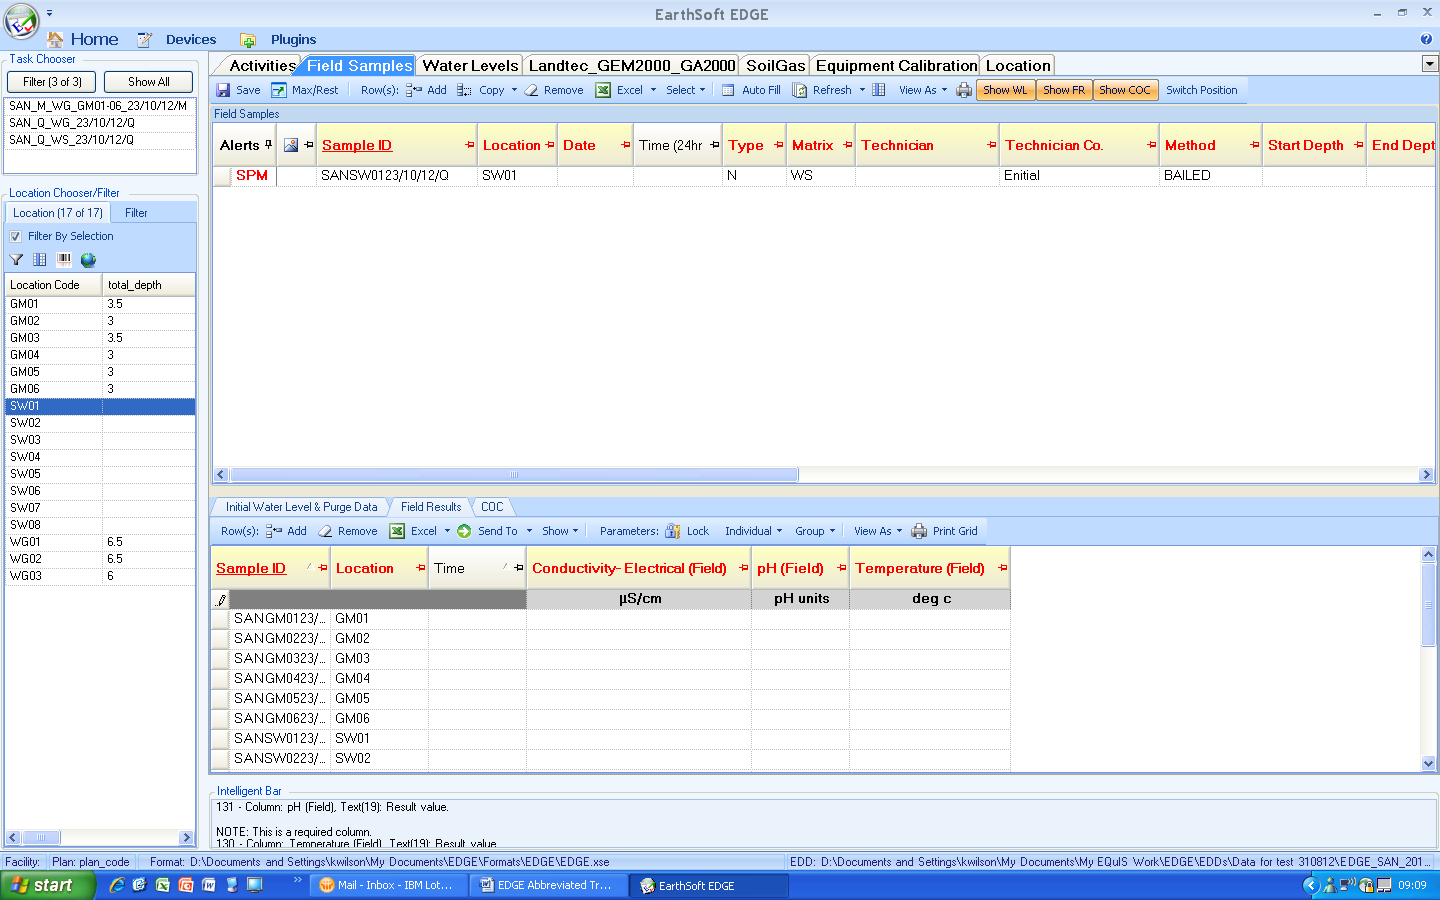
1)The planned samples required to be taken will appear on the Field Samples. If the Filter By Selection box is ticked the sample in the Field Sample pane will be specific to the location selected in the Location Chooser pane. If the filter is off, all samples will appear
2)Select your sample and enter the following information:
a.Firstly enter the Sample Date to ‘create’ a record of the sample – Alerts box then displays number of fields left to complete, and must fill fields are highlighted in red
b.Sample Time is populated automatically with the date, so enter the date when the sample is taken
c.Enter your name in Technician from the drop down list
d.Use the Method shown to collect the sample – if this method cannot be used for some reason, alter the Method to another from the drop down and put a reason into the Sample Comments field
e.Enter the Start Depth and End Depth of the sampling pump, or the same for a surface water. These depths must always be in m
f.Enter Odour, Sample Colour and Weather from the drop down
g.Where a sample is taken, you MUST enter a Date Sent to Lab
h.If there is a need to record any information about the sample or the sampling method enter this into the Sample Comments field
i.Composite Y/N and Composite Desc can be ignored unless you have been given specific training.
j.When all the required information has been completed the Alerts column will be empty. If there are remaining must fill fields to be filled there will be a red number in this column. BUT there are still the conditional MUST FILL fields such as Date Sent to Lab, Qualifier and Qualifier Note in specific circumstances that are also required, as above. Please check the whole record for completeness before moving on to the next location.
3)Add Field Results
a.Select the sample you want to add results for in the top pane
b.The sample results will be added to the lower pane.
c.Complete the grid with your field data.
d.Enter the results in the Units shown. DO NOT change the units, even though you can . If an instrument produces a resuilt in different units, e.g. EC is given in mS convert the result in to uS by multiplying by 1000.
If you can’t take a sample
Where a sample cannot be taken the following changes are required to the above:
1.Change the Type entry from N to NST which is the code for No Sample Taken. This will ensure the sample code does not appear on the Chain of Custody
2.Enter an appropriate code in the Qualifier cell for the sample
3.Enter a description of the reason a sample could not be taken in the Qualifier Note field
4.Enter 01/01/1901 in the Date Sent to Lab field
5.Leave Start Depth and End Depth blank
6.Enter N/A in Odour and Colour
SAVE frequently
Check in Intelligent bar at the bottom that SAVE is successful
![]()
Enter topic text here.