Where a Panasonic Toughbook tablet computer is provided there is a built in camera. If a Toughbook is not provided photographs should be taken with a camera and then transferred to the computer of tablet being used to complete the EDGE file. You are asked to take photographs of anything that you feel would be helpful to assist CEMEX back in the office. However, please restrict this facility to important issues. Further guidance is provided below.
A primary use would be to illustrate a borehole condition problem such as damage by say a tractor. A well taken photograph would help in enabling the right parts to be ordered and taken to the site to undertake the repairs rather than having to make multiple visits.
It might also be appropriate to take a photograph of a sample. This might be where a sample is very different from a previous visit and displays certain characteristics. Perhaps a usually clean groundwater is found to be black and smelly. A photograph of the sample would support the description provided in the EDGE tabs. Samples of waste taken for Duty of Care analysis should always be taken and entered in to the EDGE file.
To take a photograph on the Toughbook, press the A1 button on the panel to the right of the screen on the front of the Toughbook. This initialises the camera and a window opens on the screen with an image the camera is seeing. Using this screen frame the photograph as required and press A1 again. This activates the ‘shutter’ and takes the photograph. A window then opens to enable you to browse to the destination folder for the photographic file. Save the photograph with a brief meaningful file name starting with the Facility Code, Location Code and date without separators. An example could be HWS WG01 140912 for a location and Sample Code without slashes for a sample, e.g. HWSWG01140912 (slashes cannot be used in file names).
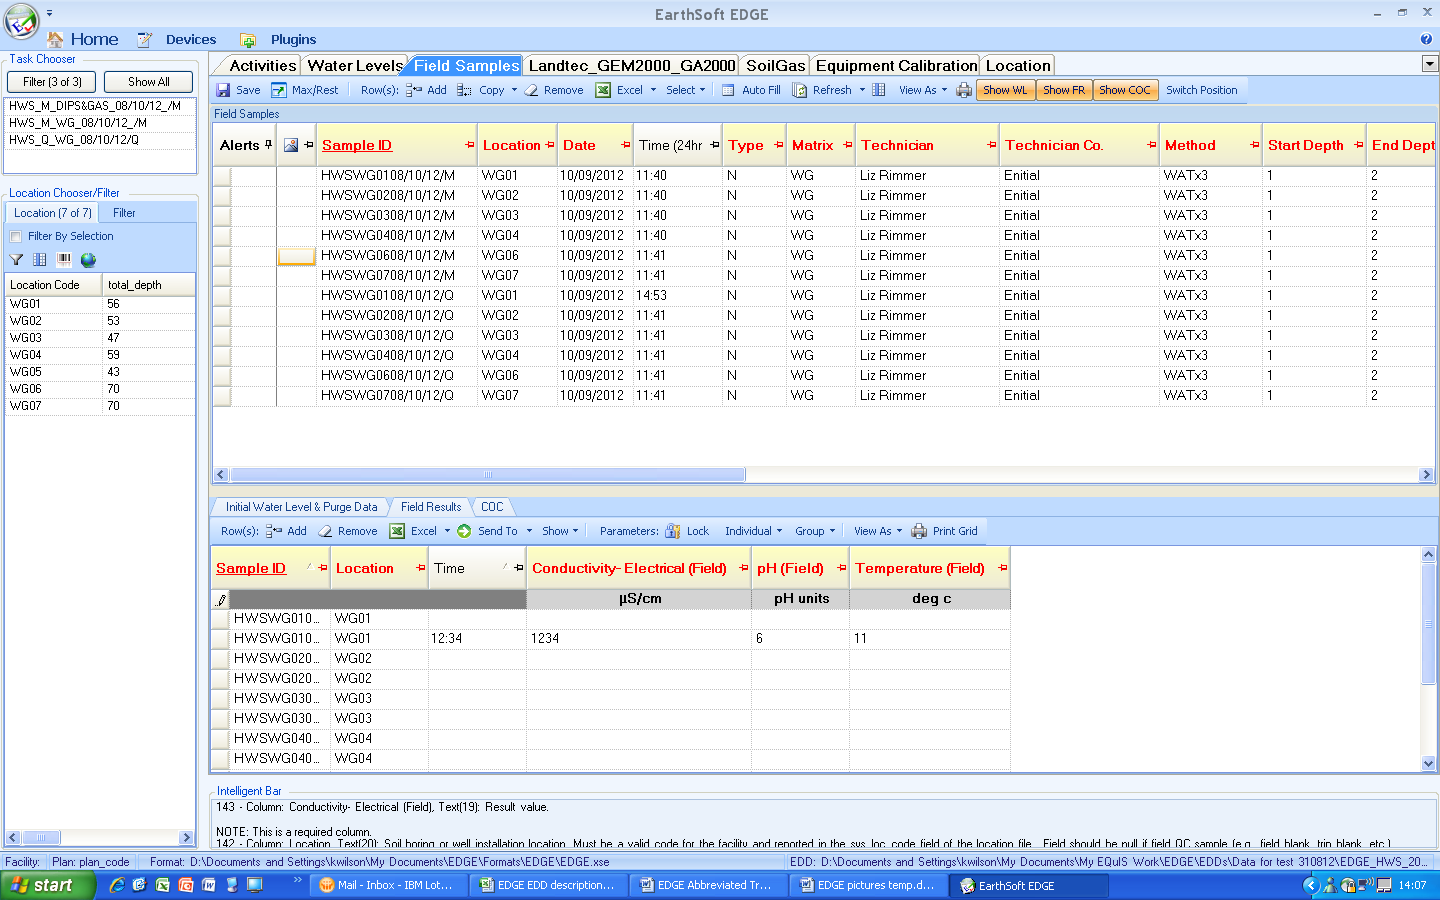
Photographs relating to Monitoring Locations must be entered through the Location tab, and those relating to Samples must be entered through the Field Sample tab.
To add a photograph to the Location tab, click in the image column in the row representing the location required to open a file selection window. In the image below you would click in the cell to associate a photograph with WG04.

The file selection window is displayed and enables one or multiple files to be added.
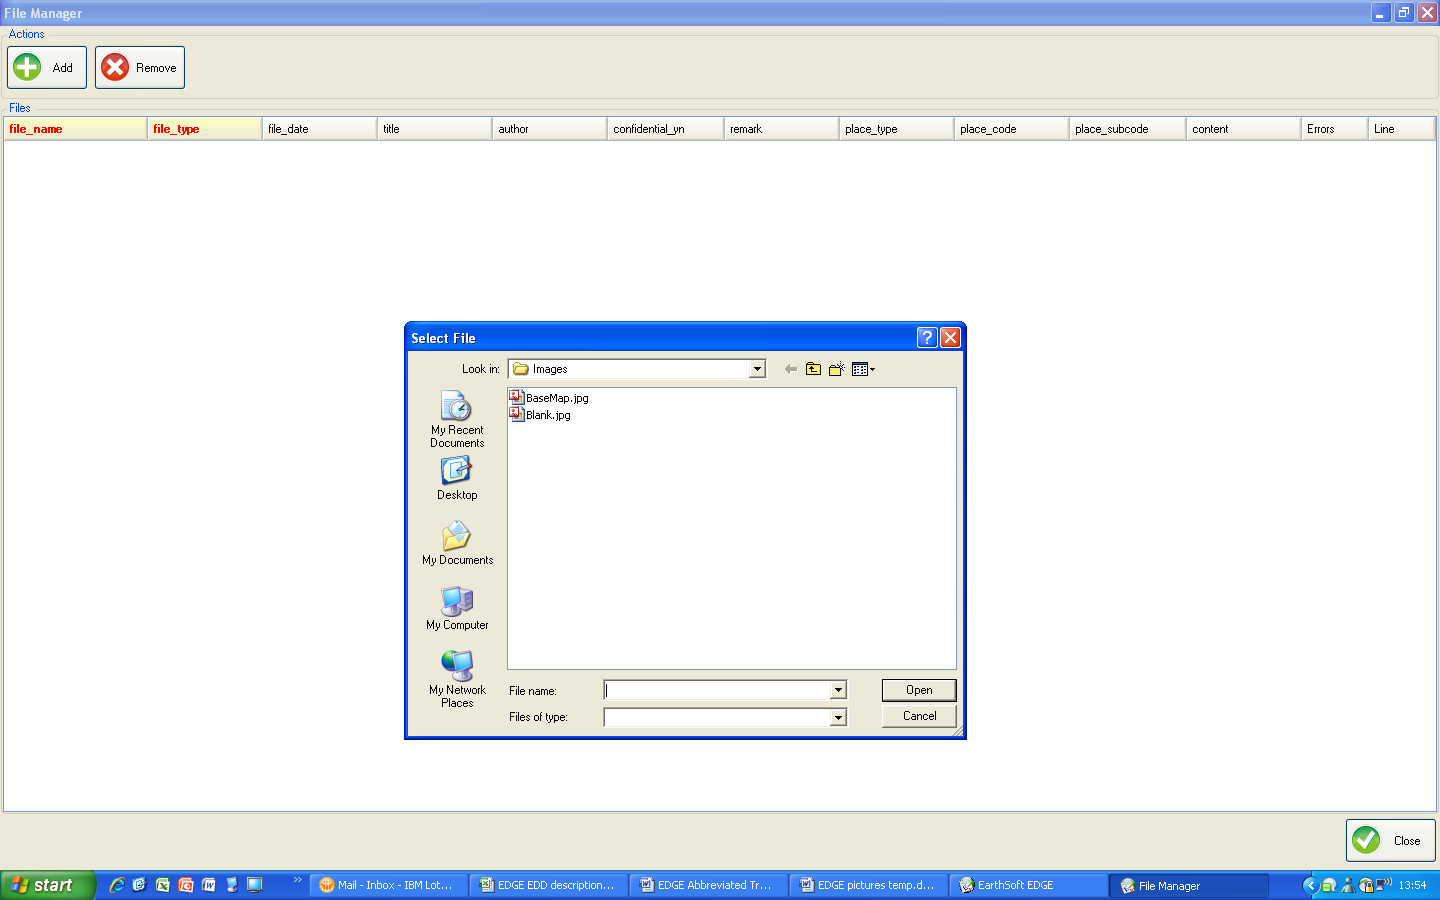
Browse to the required file and click open. This will then add a row to the File Manager.
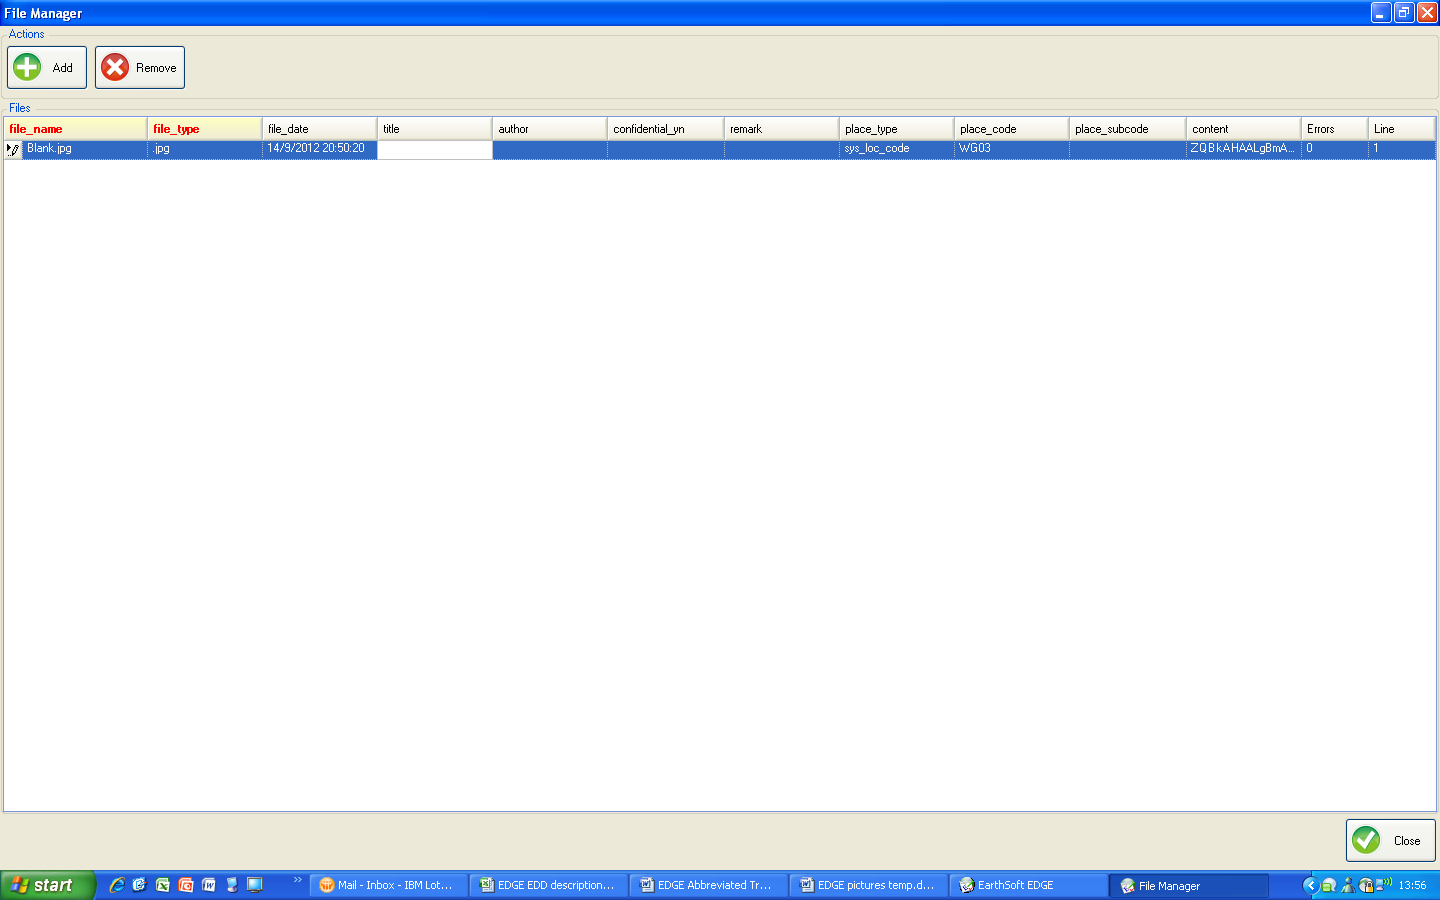
Now add a brief descriptive title starting with the facility code and date, put your name in the author field and add any additional explanations to the remark field. It would also be helpful to have the Task Code added in the place_subcode field. This can be copied and pasted from one of the other tabs. Where more than one task is associated with the location, use first one on the list.
Having completed the entry for this record, additional photographs can be added FOR THE SAME LOCATION by clicking on the Add icon and following the same procedure. When finished click on close to return to the Location tab. In the Location tab there will now be a number in the cell indicating how many files are associated with the location.
Where a photograph is to be associated with a sample select the Field Sample tab and click in the image column against the sample required. This opens the File Manager window and the same process as above should be followed.